Topaz Studio 2: Introduction and Workflow for Beginners
introduction and workflow tutorial -> | Introduction |
01 |
02|
03 |
04 |
05 |
06 |
07 |
08 |
09 |
10 |
| digital painting examples |
resources |
about |
impressionist painters
| contact-questions |
Part 6: The Impression Filter & Its Adjustment Sliders
Many if not most impressionist-like effects are achieved in part or wholly by the “Impression” filter. So we'll start this session by loading the impression "filter" (and not a "preset").
To start this session:
• close and reopen Topaz Studio (to clear it of everything you've done before),
• re-load the tigerlily image (or one of your similar in simplicity images),
• click on "Add Filter" (Not "Add Look" = presets), • click on Impressionistic.
This is what I get. Note that the there are three sets of filters each with a number of different filters. If you want to know more about the individual filters go to the topaz website. | Essential | Creative | Stylistic |
The three filter sets mary arrive closed (as shown below) or open. Each can be opened by clicking on the ![]() to the right of the name.
to the right of the name.
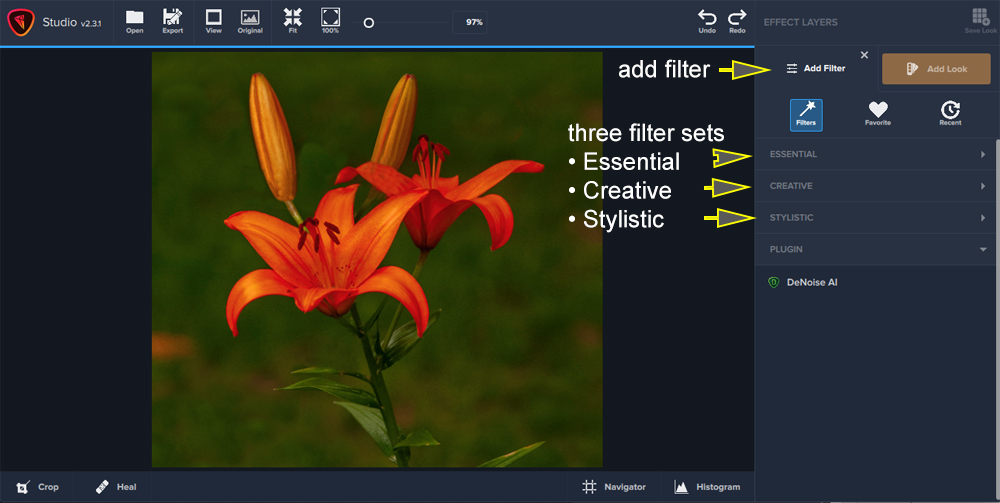
For our purposes, open the Stylistic filter set which is where "Impression" lives and click on Impression. And now you should see the top of the impression adjustment sliders and brush sets. This is the only filter that can, but doesn't always, create visible brush stroke effects like those of the impressionist painters. And that's the reason we'll spend some time on it.
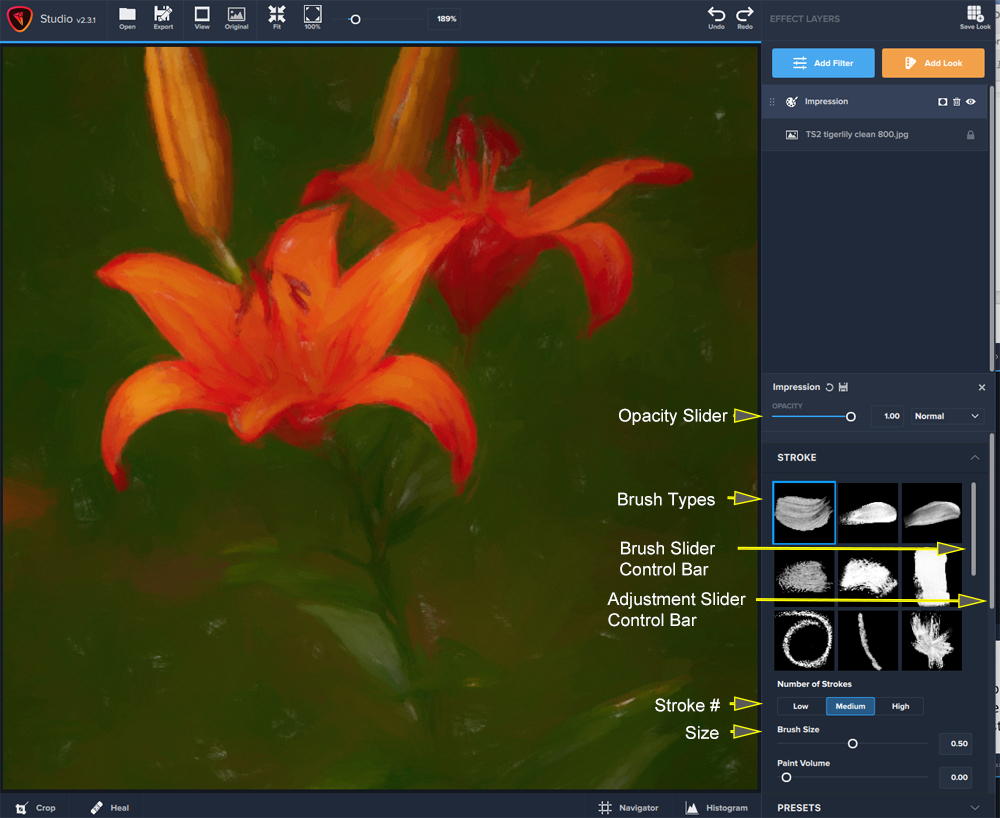
Note that the impression has created a painting-like adjustment to what was once a sharp photograph.
Click on the "Opacity slider" and move it all the way to the left. This should now show the image as it was originally. I like it set at about .65 where it's starting to look more like a painting than a photograph, albeit I'm not satisfied with that look because I like seeing brushstrokes. At least the .65 setting has all the flower's anthers showing clearly.
Next click on the brush types to see what happens. Some won't show the tigerlily (or your flower) well, e.g., white spots appear on the image. If happens, click on the brush size from medium to high and medium to low. If the white spots remain, try adjusting the various sliders. As you do, keep your focus particularly at the flower.
Then play with the impression slider set. Once of my aims is to give it a bruchstroke or transparent, aka watercolor, or paint spillover effect, where as the background can remain quite plain of have a bit of texture added to is. To see a description of what each slider is supposed to do, click here -> Impression Sliders The information page will open in a second tab or window so that you can look at it as you play with the sliders.
Finally, before you leave, check out the three adjustment slider sets at the bottom by scrolling on the Adjustment Slider control bar to the far right. There you'll find Sliders for Color, Lighting and Texture. Again, use them to tinker with the image.
As you do all of the above, you can get a fresh start at the original Impression filter by clicking on the reset circle and you can reduce the impression filter effect by changing the opacity.