Topaz Studio 2: Introduction and Workflow for Beginners
introduction and workflow tutorial ->| Introduction |
01 |
02|
03 |
04 |
05 |
06 |
07 |
08 |
09 |
10 |
| digital painting examples |
resources |
about |
impressionist painters
| contact-questions |
Part 5: The Impression Filter
Man impressionist painting-like effects are achieved in part or wholly by presets employing the “Impression” filter, sometimes alone and sometimes coupled with other filters. A preset is comprised of one or more filters with adjustments made to the various filters to achieve its effect.
Among my favourite starting point presets is "MI Impressionist". If you search for it with the magnifying glass, you can likely find it among your presets. Below is what I get on my search. Note that I got MI Impressionist to show up on my list of presets by setting boththe "Look Category" and "Sort by" menus to "All", where "all" refers to all the filters that came with TS2:
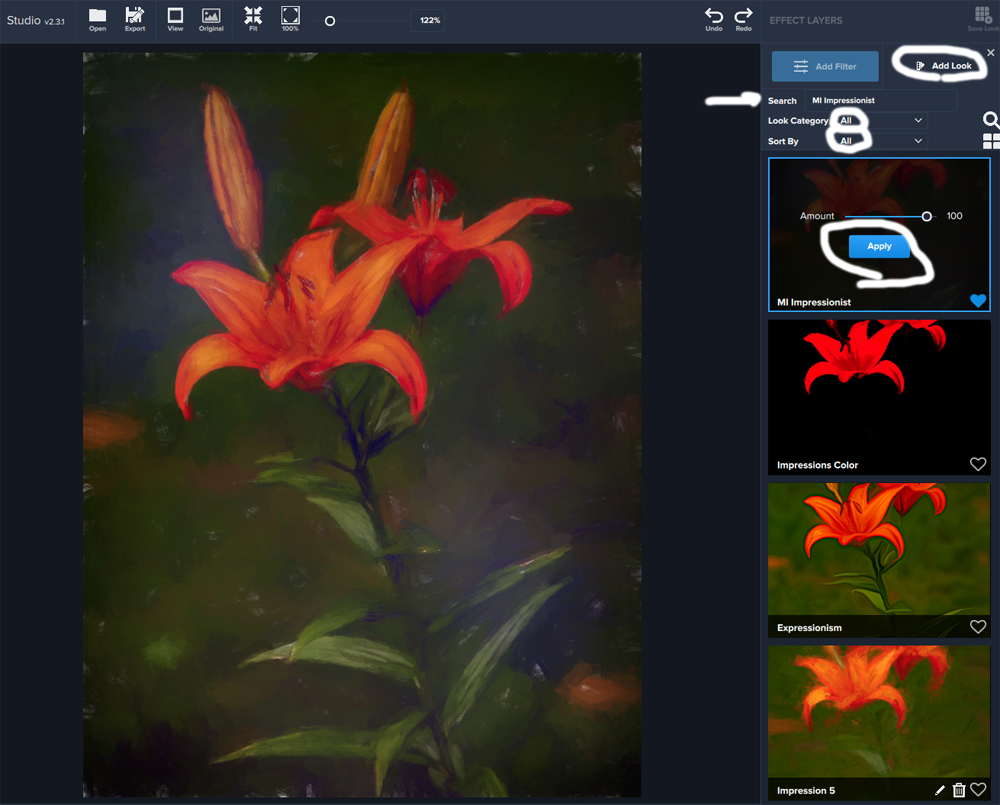
Note that I've not yet clicked on "apply". I get to see the effect that MI Impressionist by simply running my cursor over it. Also note that I've added the filter to my favourites collection by clicking on the heart. I'm also tempted to click on the hearts on two of the other presets: "Expressionism" and "Impression 5" because both strike me as producing useful starting points for the type of image I'm interested in impressionizing (I don't think that's a word, but what the heck). Did I already mention that a preset that's a good starting point for one image may not work for another? Don't ask me why. Nor do I kknow what the "MI" stands for in the name of this preset. Can it be that the person who created the prest was feeling IMPish?
Next click on the blue "Apply" button to see which filters comprise the "IMP". My result is shown below. The "IMP" is comprised of four filters, with a repeat of "texture". Note the stacking of filters. As you move up from the image at the bottom of the stack, you first find a basic adjustment, then a texture, next an "Impression" (as promised - many impressionist effect presets contain the filter "Impression", and finally at the top another texture. I'm not sure why the creator made his/her preset this way, I just know that it seems to produce what I've learned is a good starting point to try to reach an effect I want. To be clear, this isn't the final effect I want, and it's likely that none of the presets in the TS2 collection will produce a final effect that satisfies my eyes.
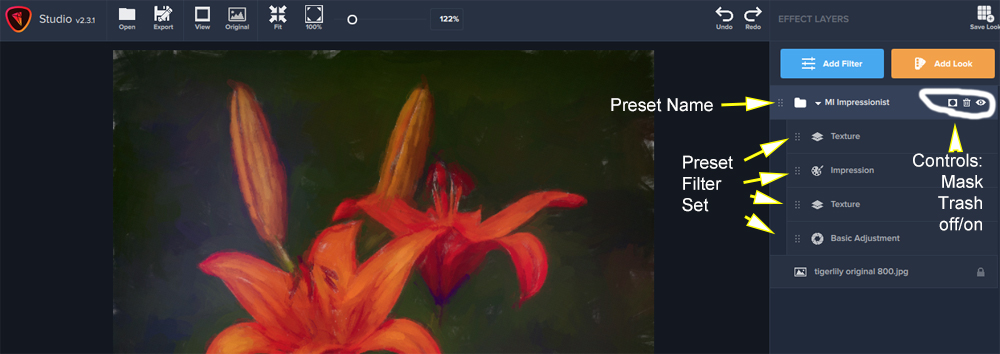
Before we start work on the impressionist filter which is but one filter that produces the current effect, let's explore preset filter sets a bit. Some presets come with only 1 filter, some come with two or several or many. Each filter in a set is contributing to the effect that we see, which again, may not be the final effect we want for our image.
First, note the 3 controls that come with IMP. If you click on the mask, you will get a variety of masking devices including the usual paintbrush. You can use the paintbrush to lessen the effect on all or parts of the image. The second is what it looks like ... click on it and the preset will disappear. The third is an on/off operating the overall preset. If you click on the line where each filter appears, the three controls will appear and you can mask and change that filter, trash it, or turn it off, but not lose it because you can turn it back on.
I suggest you give this a try. Here's an exercise that will help you understand and gain control of the TS2 presets and image-making process.
1. Turn the eyes off for each of the 4 filters, so that none are operating on the original image. But DO NOT turn the eye off for the preset.
2. Then turn each filter eye on as it appears in the stack from the bottom up until they're all on again.
3. Next turn them all off and turn them on one at a time, with all the others off and click on that filters line. When you do that, you'll see the adjustment sliders that are used to create the effect. They operate much like the adjustment sliders that you use in other image adjusting softwares like photoshop and lightroom. When you finish looking at one, turn it off and go up the stack and turn the next on and examine its sliders.
If you play with them a bit, you'll get a feel for what each filter does and you'll find that the 4 filters work together no matter which order you turn them on in.
On the next step, we're going to isolate the impression filter in isolation and learn how to operate it's adjustment sliders. That will be the trick that enables you to create the final effect you want for your image.